
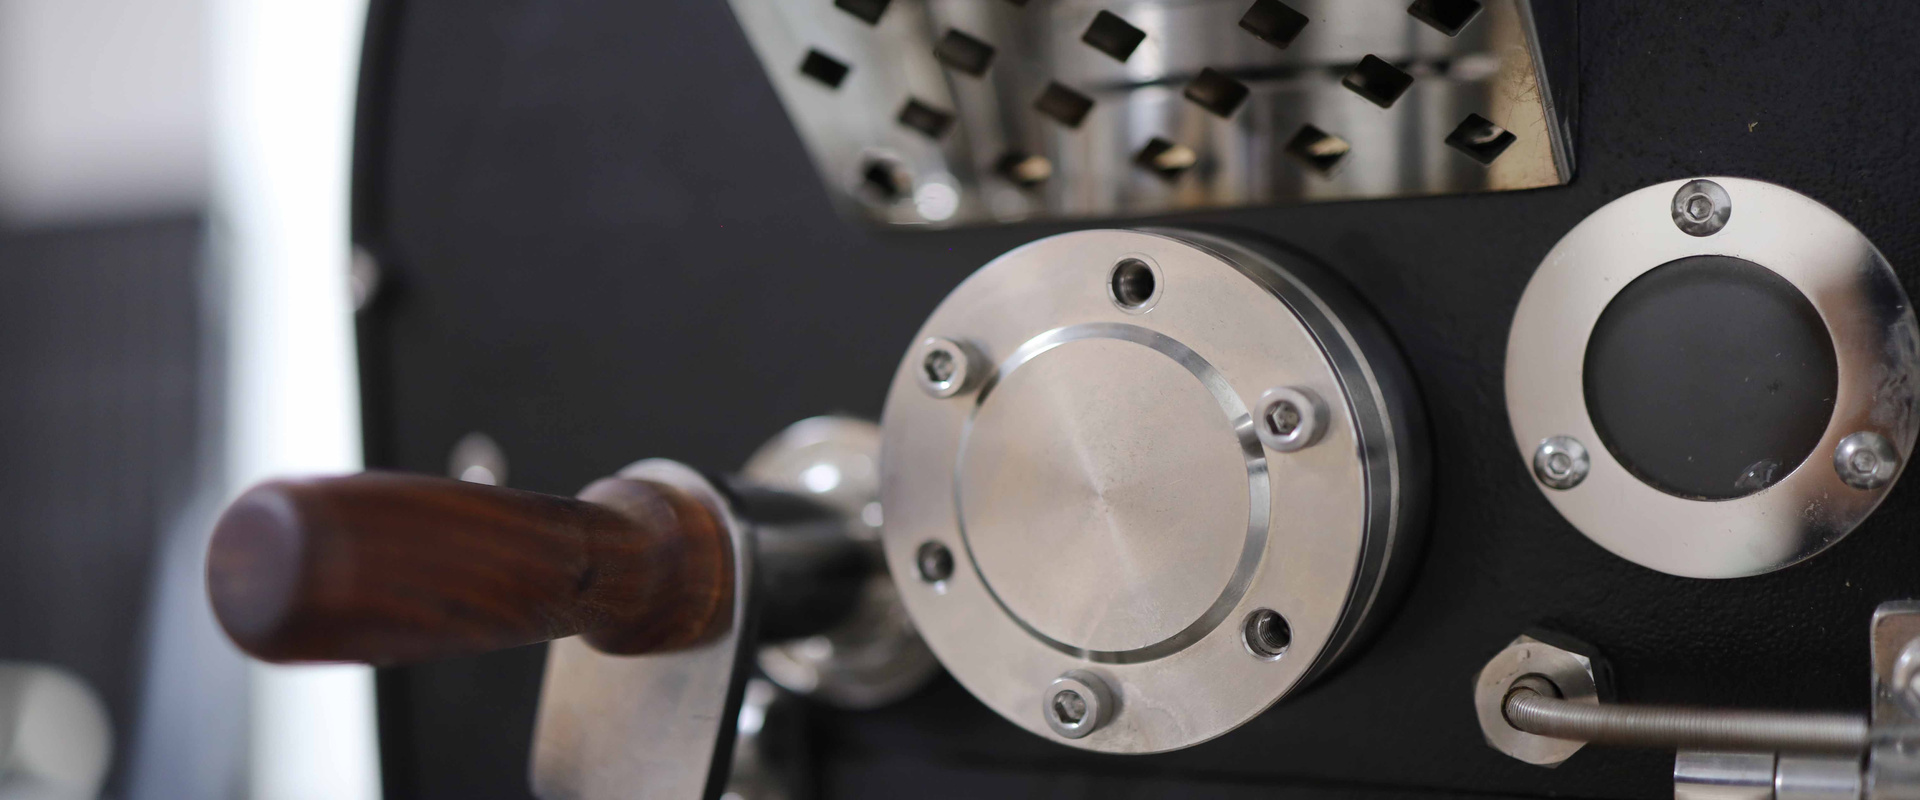
The machine you are about to spend several thousand dollars on does one job: it turns your green coffee into roasted coffee, batch after batch, every day you open. Most explanations of how a commercial coffee roaster works stop at "it heats the beans." What you need to know is what happens in the ten to fifteen minutes after you open the hopper — in what order, and what you watch. Here is one batch, charge to cooling tray.
One batch, six stages: the map
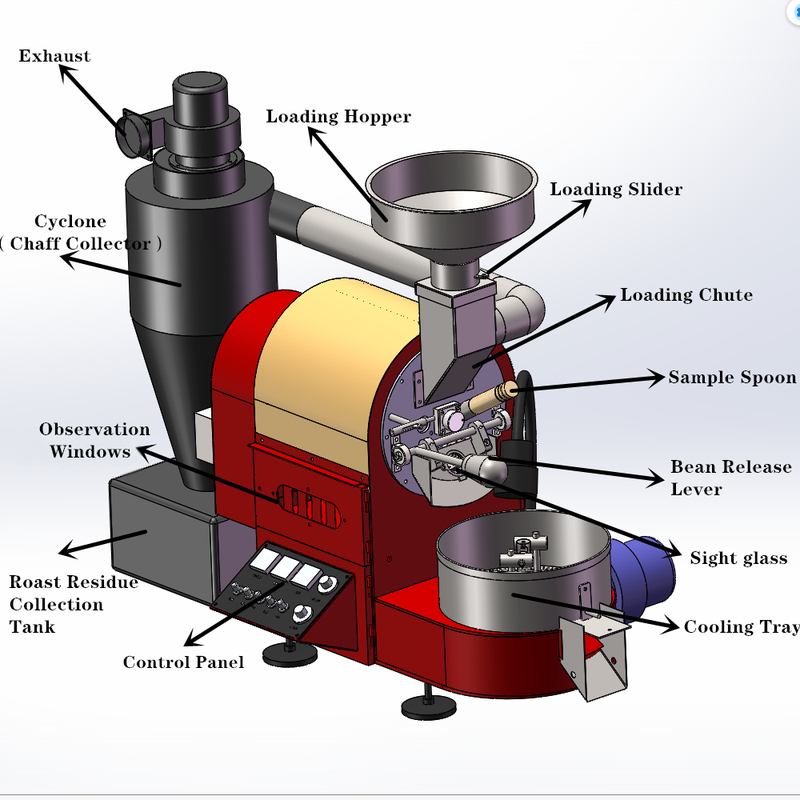
Here is the whole trip in short. Your green beans sit in the hopper above a hot, rotating drum. You open the gate and they drop in. For the next ten to fifteen minutes the burner under the drum feeds heat, the drum turns the beans so no bean sits on hot metal for long, and a fan pulls steam and smoke out the back. You watch a temperature probe and a sample spoon.
When the beans reach the colour you want, you open the front door and they fall into a cooling tray, where a second fan and a stirring arm bring them back to room temperature. Chaff and smoke go through a cyclone and out of your building. Whether the spec sheet you are reading calls it a commercial coffee bean roaster or a coffee roasting machine, that sequence is the same.
At any moment the machine is doing one or more of five jobs: putting energy in, keeping the beans moving, pulling moisture and smoke out, measuring, and cooling. Each stage below says which job is in front, what you watch, where machines differ, and what that difference means for how you will run. If you want the parts themselves defined one by one, that is a separate guide: what each part decides on the spec sheet. This one is about the sequence.
Stage 1 — Preheat and charge
The job in front: putting energy in — into the machine, not the beans yet.
Nothing goes into a cold drum. The drum turns empty while the burner brings it to charge temperature — charging is simply dropping your weighed beans into the hot drum, and everything before that moment is preparation. On our machines the target is 180 °C, and the number you are waiting for is the drum's temperature, not the air around it. A drum has to be hot wall to wall, and the frame around it warm too, because your beans are about to take heat from all of it at once. Charge into a drum that only reads hot at the probe and your first batch comes out uneven, with nothing you can do about it later.
While the drum heats, you weigh the batch into the hopper. Rated capacity is a maximum, not a setting; most machines roast best at 60 to 100 percent of it, and the usable batch window is its own topic.
Then you open the gate. Room-temperature beans hit a 180 °C drum, and the probe does something that surprises people the first time: it drops. For one to two minutes the reading falls, bottoms out, and climbs again. That low point is the turning point. The beans are pulling heat out of the drum and the frame, and the probe is telling you how much heat the machine had stored. On the same machine with the same batch size the turning point should land in the same place every time. When it does not, you have learned something about the machine before you have learned anything about the coffee.
Where machines differ here is how much heat they store and how fast they give it back — and that decides how often you will be correcting during a roast. A cast iron drum — standard on our SD and YS series — holds a lot of heat: a little longer to preheat, but a higher turning point and a steady climb afterwards. A thin stainless steel drum, which is what our DY 1 kg and 2 kg roasters have, preheats fast, rebounds fast, and follows the burner closely, so you correct more often.
A double-wall cast iron drum, fitted on the SD Pro, puts an air gap between the wall the burner heats and the wall your beans touch. Conduction slows one more step, and your beans are less likely to be marked at charge. The reasoning is on the cast iron drum page.
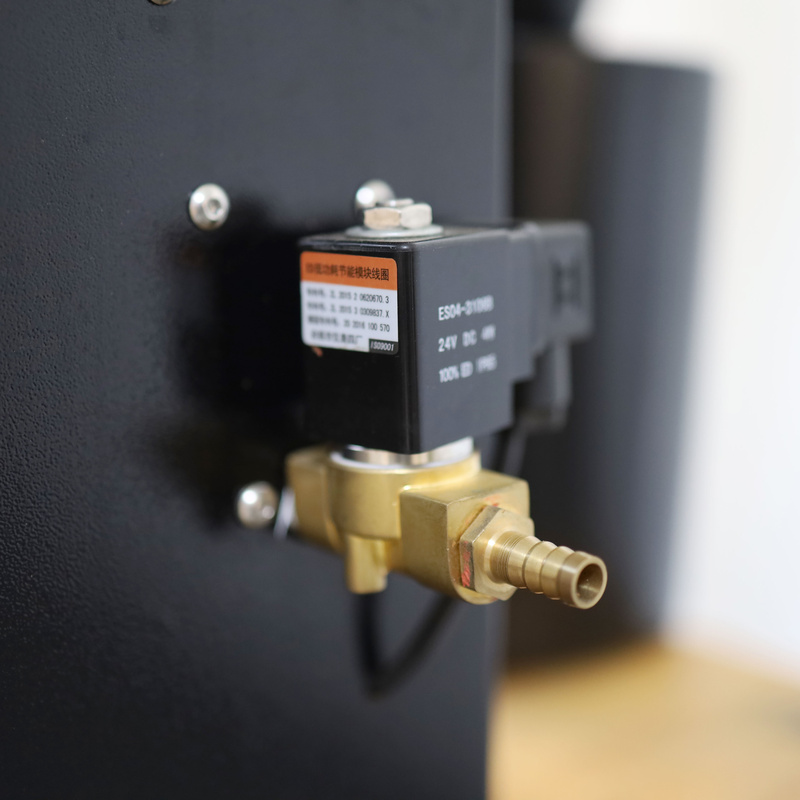
The other difference is who opens the gate. On a manual machine you do. On a PLC machine such as the SD Pro — PLC being the automatic controller that runs the roast from a stored recipe — the controller first checks that the exhaust fan is running and the cooling tray is empty, then opens the gate. Those are two checks you would otherwise be making yourself, every batch.
What this means for your operation. The first roast of the day is the one most often thrown away, and it is almost always a preheat problem, not a coffee problem. Plan for it: allow 20 to 30 minutes of preheating from cold, and on a cast iron drum expect the first batch to run slower than the second.
Decide your working batch size now, not after delivery — if you will normally roast 2 kg, a 3 kg machine at two-thirds load behaves better than a 2 kg machine at its limit, and the price gap between the two is small. And check the power before anything else. One customer's advice after installation was simply "double check your power requirements first" (#123); the motors and controls on every gas machine we build run on single-phase 220–240 V, which is the most common question we get from sites that cannot supply three-phase.
Stage 2 — Drying: the burner does the work
The job in front: energy in, beans moving, moisture out.
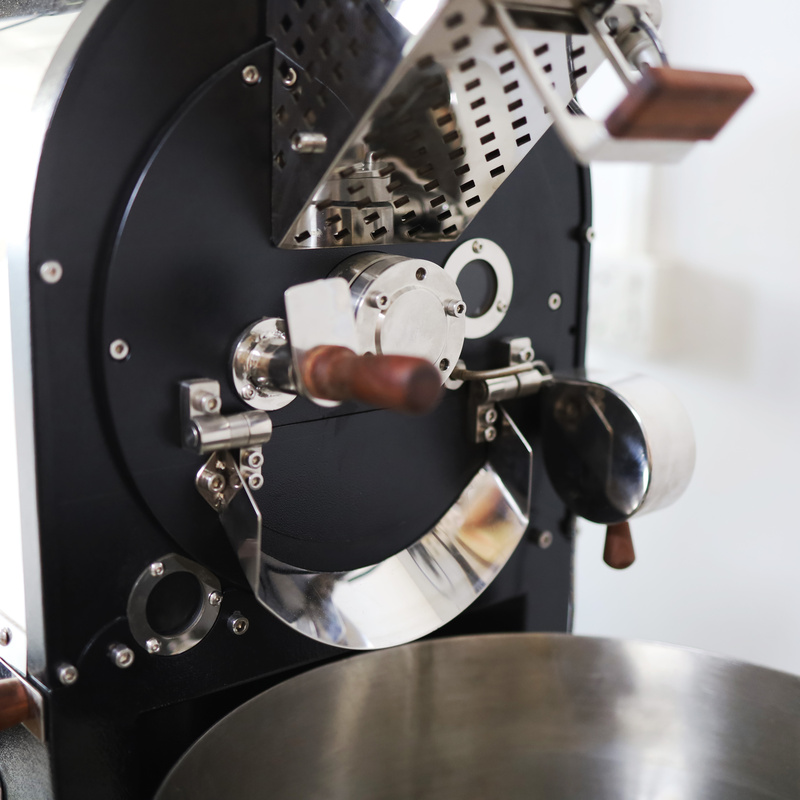
For the first minutes after charge the burner stays high. The drum turns at a fixed speed set by its diameter — roughly 70 to 80 RPM on a small machine, around 40 on a 60 kg drum. You will never adjust it, but it matters to you: the vanes inside lift the beans and drop them, and on every turn a bean touches the hot wall once and falls through the hot air once. If your drum ever slows — a worn belt is the usual cause — beans sit on hot metal longer, and you start seeing scorched patches with no change in your settings.
Right after charge most of the heat comes from the wall; once the turning point passes, most comes from the air moving through the drum. That switch is why the exhaust fan matters to you from the first minute, not only when there is smoke to remove.
Green coffee arrives with 10 to 12 percent water in it. In this stage that water turns to steam, leaves the bean, and the fan carries it out. The beans go from green to yellow. On most commercial drum roasters this takes three to six minutes and the bean probe reads under 160 °C — though the number depends on where the probe sits in your drum, so treat anyone else's curve as a reference, not a target.
What you watch is the rate of climb: degrees per minute, and whether it is steady. What you adjust is the damper, and this is the control most people misunderstand. The damper does not only vent smoke. It sets how much hot air passes through your bean pile, which means it sets how much of the heating is convection.
Close it too far and steam stays in the drum and the climb stalls. Open it too far and you pull heat out faster than the burner puts it in, and your beans dry out on the surface while the inside is still raw. In this stage you will most likely keep it near the middle and open it as the roast goes on.
The heat source is where machines differ most here, and it is the first line on any spec sheet you should read — because the right one is decided by your building, not by your roast:
- Semi hot air — every gas machine we build from 1 kg to 20 kg. This is the type you will be looking at if your site has a gas line or can take a cylinder. The burner sits under a solid drum, the flame never touches your beans, and heated air is drawn through from the back. Spec sheets often call this an indirectly heated drum; it is how most commercial drum coffee roasters work.
- Electric elements — the electric DY and SD versions replace the burner with elements; this is your route if you have no gas and roast 1 to 2 kg. Heat is even, response a little slower. A 1 to 2 kg machine runs on single-phase 220 V; 3 kg and above needs three-phase 380 V.
- Full hot air — the electric SD Pro and everything from 20 kg up heat air in a separate chamber and blow it in. The drum wall stays cooler; conduction is at its lowest. You will meet this type when your volume takes you past 20 kg.
Direct fire, where flame reaches the beans through a perforated drum, is still sold by others and is not covered here. If a supplier offers you one, direct fire, semi hot air and full hot air compares the three so you know what you are being offered. Machines with no drum at all, where beans float on a column of hot air, are a different category; the FAQ below covers the trade.
What this means for your operation. Choose the heat source from your building, not from the roast. If the site has a gas line or can take a cylinder, a gas coffee roaster is the simpler machine: it needs only a 220 V socket for motors and controls, and it answers the valve within seconds. If there is no gas and you are at 1 or 2 kg, a commercial electric coffee roaster with elements on single-phase 220 V is the practical route.
If there is no gas and you want 3 kg or more, the machine will need three-phase 380 V. In a 110 V country that means a transformer and an electrician's sign-off before the crate arrives. It is the single most common question we are asked from that market — "what is the solution if our space can't get 240/220 V?" is a direct quote. Fluid bed is the answer only if you have no gas, no three-phase, and small batches; for anything you would call production, it is a drum.
Stage 3 — Browning: the operator takes over
The job in front: measuring — and deciding.
Somewhere around 160 to 175 °C the beans stop absorbing heat and start giving it off. Sugars and amino acids inside the bean begin to react — the reaction that browns bread crust — and the colour moves from yellow to light brown. The chemistry is not the point. The point is that a bean producing its own heat no longer needs the burner at full; leave it there and the climb runs away, and you reach first crack too early, with the inside of the bean still underdone.
So this is where you cut the gas. The reading that tells you when is the rate of rise: degrees per minute, plotted over time. You want that line to fall gently and smoothly through this stage. A line that spikes and crashes is what produces flat, baked coffee — "baked" being the roaster's word for beans that spent too long at too little heat — not slow roasting itself. How much to cut, and when, is the judgement that separates one operator from another, and it is where the three kinds of control on the market actually differ:
- Manual buttons — on our SD and DY machines you read the probe, turn the gas valve and move the damper by hand. Artisan roaster software (free over USB or Bluetooth on the DY, optional on SD and YS) draws the curve on a laptop so you can see the rate of rise. It shows you the line; it does not move the valve.
- Touch screen — on the YS series you set gas, damper and drum speed on a Siemens screen, with your saved curve beside the live one. Two thermocouples feed it, one for bean temperature and one for exhaust air, so you see both lines you need.
- PLC automatic — on our SD Pro fully automatic roasters a stored roast profile holds the settings. When the bean probe reaches a temperature you set, the controller reduces the burner and opens the damper on its own. This is the line between a machine that shows you the roast and one that runs it for you. What automation buys you goes through it.
What this means for your operation. The question we hear most on this stage is some version of "does the machine reproduce the profile alone?" — and the honest answer is: only a PLC machine does. A touch screen stores the curve for you to follow; Artisan draws it; neither turns the valve.
So decide who will be standing at the machine. If it is you, every batch, and you want your hands on the gas, a manual machine plus Artisan gives you the same information for several thousand dollars less. If the roaster will be run by staff, by more than one person, or by someone who also has to serve at the bar, the PLC pays for itself the first time a batch is not ruined by a late cut. On our 3 kg coffee roaster the manual and PLC versions are listed side by side with their prices; the gap between them is the cost of not having to be there.
Stage 4 — First crack and development
The job in front: moisture and smoke out — and the drop decision.
At a bean reading of about 195 to 205 °C the pressure of steam and gas inside each bean breaks the cell structure, and the whole batch pops within a short window. That is first crack, the one event in the roast you hear rather than read. The beans have swollen by a third or more and lost 14 to 18 percent of their charge weight, most of it water.
Two things change on the machine at first crack. Smoke and chaff increase sharply, so the fan needs to pull harder and you open the damper. And the burner comes down again, sometimes to its minimum, because the beans now generate more heat than they need. From here to the drop is development time. Keep going to about 224 °C and you reach second crack, which only matters for dark roasts.
The time first crack arrives is the most useful number this stage gives you about the machine rather than the coffee. With the same batch size it should land within seconds of the same minute every roast. If your full batch takes nine or ten minutes to get there, the burner is small for that load or your gas pressure is low, and you have two choices: roast less per batch, or fit a burner that matches.
Burner size and pressure are set for your country's gas before shipping — the burner train: nozzles, pressure regulation page shows what is set. Whether you run LPG vs natural gas changes the nozzles and the pressure, not your roast.
Then you decide when to drop. Pull the sample spoon, look at colour, read the bean temperature, and open the door when the batch matches the last one. Do not drop on someone else's temperature; their probe is not your probe. On a gas machine the burner answers a valve change within seconds; on electric elements it holds heat, so you cut earlier. On a PLC machine the changes at first crack are triggered by temperature; on a manual machine, by your ears.
What this means for your operation. When first crack comes late, look at the gas supply before you blame the machine. A 3 kg gas machine of ours wants 5 kPa on LPG or 6 kPa on natural gas at the burner; a customer who could not get past 2 kPa from his cylinder regulator had a starved burner, not a faulty roaster. So before delivery, know what your regulator and your cylinder size actually deliver — the answer differs by country and by cylinder — and tell us which gas you run so the nozzles ship right.
And keep a log of first-crack time per batch size from day one. It is the cheapest diagnostic you will ever own: when it drifts, something on the machine has changed, and you will see it in the log weeks before you taste it in the coffee you sell.
Stage 5 — Drop and cooling: where batches per hour is decided
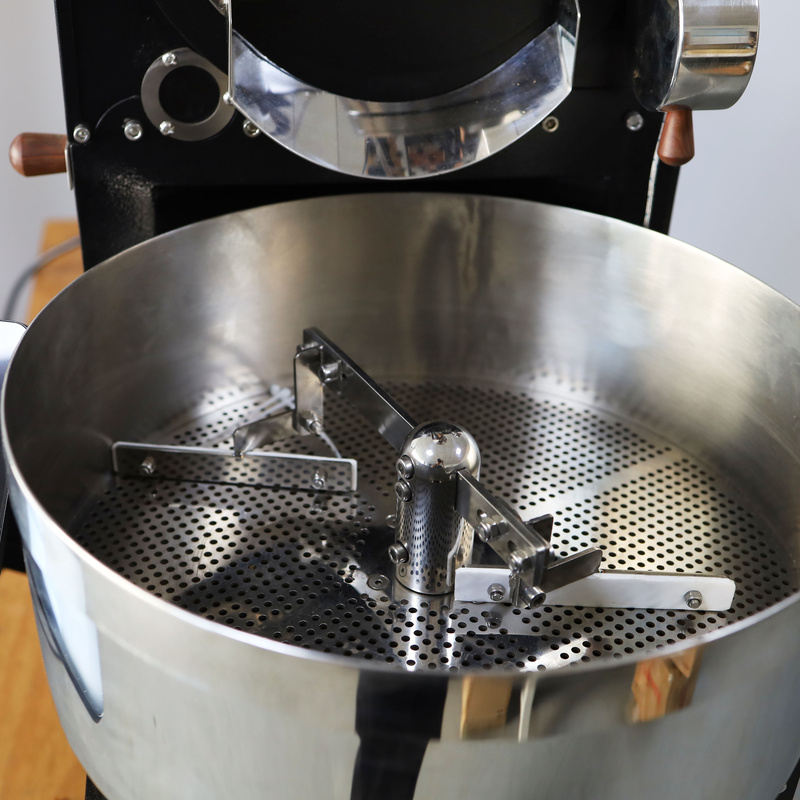
The job in front: cooling — while the drum is already free.
The drop is a sequence you will run ten to thirty times a day, and the order matters:
- You start the cooling tray's stirring motor and fan first. Air is pulled down through the tray's perforated floor.
- You open the drum door — a lever on a manual machine, a pneumatic cylinder on an automatic one — and the beans fall out. On our SD series the drum empties in about 13 seconds.
- The stirring arm pushes the pile away from the door, spreads it, and keeps it turning while the fan pulls the heat out. You do nothing here but watch.
- For 60 to 90 seconds after the drop your beans are still roasting themselves. Every second you lose here is a darker roast than the one you dropped.
On the sizes you are most likely comparing — up to 15 kg — cooling on our machines takes one to two minutes; from 20 kg up, three to five. On the SD series the target is two minutes for single-origin batches and two and a half for blends. Larger industrial roasters often add one step before the door opens: a short water spray inside the drum that takes the first edge off the heat, with the fan opened to clear the steam. Under 20 kg there is no spray and you do not need one.
What matters for your output is what the drum is doing during those two minutes. If the cooling fan, the stirring motor, the drum motor and the exhaust fan are four separate motors — as on the YS series — the drum is free the moment the door closes. You can charge the next batch while the last one is still on the tray. If the tray and the exhaust share one fan, which is common on cheaper machines, the drum loses airflow while the tray is cooling, and your next charge waits.
Your kilos per hour is not batch size times sixty divided by roast minutes; it is that, minus every minute your drum stands idle. The tray also has to hold a full batch, or you drop in two halves and lose the same time. The four independent motors page shows the layout. If you are considering a fluid bed machine, it still needs a separate cooler. A well-insulated hot-air chamber keeps roasting after the heat is off.
What this means for your operation. Size the machine from your weekly roasted volume, not from the largest number on the sheet, and count the cooling. A 3 kg machine of ours does 8 to 12 kg of roasted coffee an hour with continuous charging; a 6 kg roaster does 18 to 28; a 12 kg roaster, 18 to 52. So a shop selling 30 kg a week — about 35 kg green, once you allow for weight loss — is three to four hours a week on a 3 kg machine, one roasting day.
At 100 kg a week you are at eight to twelve hours on a 3 kg. That is where people start losing a whole day to the roaster; a 6 kg brings it back to four to six. "How many batch kg per hour" is one of the ten most common questions we are asked, and the number only means something if the machine can charge while it cools, so ask for the motor count with it. One person can run charge and cooling in parallel on a four-motor machine. What happens after the tray — resting and degassing — is the coffee's business, not the machine's.
Stage 6 — Chaff and smoke: what leaves the machine
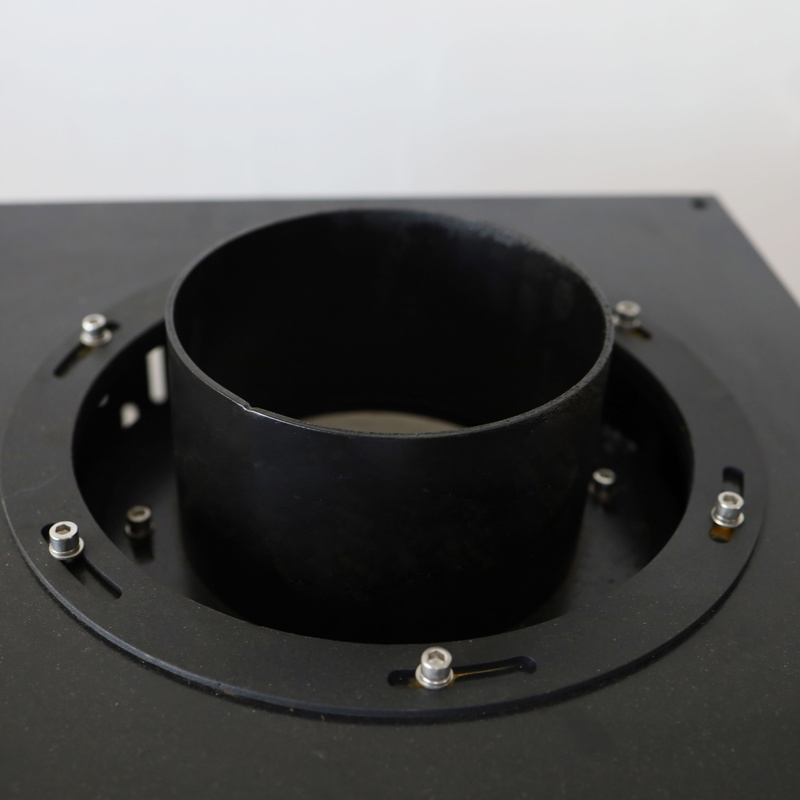
The job in front: moisture and smoke out — all the way out of the building.
From charge to drop the inside of the drum should sit at slight negative pressure. The exhaust fan pulls air out of the drum, through a duct, into the cyclone, and outside. That pressure is your simplest health check on the whole coffee roaster exhaust path: if smoke comes out of the drum into the room, the drum has gone positive, and the fan, the duct or the damper needs looking at before the next batch.
Chaff — the thin skin that comes off the bean during roasting — rides out with that air. In the cyclone the air spins, chaff is thrown to the wall and falls into the chaff collector bin, and the cleaner air leaves through the top. Chaff burns easily, so you empty the bin daily and, on dark roasts, every two or three batches. On the YS series the bin is a separate unit from the machine body, so you empty it without stopping. You brush the duct out on a schedule too, because chaff settled in the duct is the usual starting point for a roaster fire.
Smoke is different. The cyclone separates chaff; it does nothing to smoke. How much smoke your machine puts out is set by your menu more than by the machine: before first crack there is little; after first crack, a lot; and if you roast dark for espresso, expect several times the smoke of a light filter roast. Cooling air carries smoke too for the first minute, and larger machines route it into the same exhaust. Where the smoke goes after the cyclone depends on where your machine sits and what you roast:
- If your unit stands alone, you roast light to medium, and nobody shares a wall with you, a cyclone and a chimney to outside is enough for a small commercial coffee roaster.
- If your machine sits inside a shop, or your neighbours are a wall away, you need an electrostatic smoke filter: it takes smoke and oil out of the exhaust but not the smell. Electrostatic smoke filter explains what it removes and what it does not.
- If you roast larger batches, roast dark, or your local rules are strict, you need a coffee roaster afterburner: it burns the smoke off and takes the smell with it. Our 30 kg coffee roaster and larger packages ship with one. When a roastery actually needs an afterburner is the decision guide.
Machines that build the afterburner inside the roaster and vent nothing exist, at several times the price of a conventional machine of the same batch size; for most shops you are better served by a conventional machine plus the right exhaust. Your room also needs make-up air: fresh air coming in to replace what the fan pulls out. Duct size and make-up air are both in ventilation requirements.
What this means for your operation. Two questions we get on this stage have short answers. "If I buy the smoke filter, do I still need a pipe outside?" — yes. A filter takes out what you can see; it does not take out the smell, the heat or the carbon monoxide, and the cooling tray needs a path out as well. Plan the duct run and the wall or roof penetration before the machine ships, because it is the part of the installation your landlord and your fire inspector will ask about.
And order the chaff screen and a spare cyclone gasket with the machine; a torn chaff screen is a common first replacement, and the spare parts to keep list is short and cheap to hold. Site the machine so the cyclone bin can be pulled without moving anything — you will empty it more often than any other part you touch.
What all this means when you compare machines
Every stage above ended with a difference between machines. Put together, they are six lines on a spec sheet. Read those six and you can compare any two roasters, from any maker of coffee roasting equipment, on the same basis — and you know what to ask when a line is missing.
1. Drum material and construction (Stage 1). Look for: cast iron, double-wall cast iron, or stainless steel; solid or perforated wall. It tells you how much heat the machine stores and how fast it answers the burner. Ask: what is the wall thickness, and is the drum cast or rolled from sheet? Ours: cast iron across the SD series, stainless on the 1–2 kg DY.
2. Heat source and method (Stage 2). Look for: semi hot air, electric element or full hot air; LPG or natural gas; single- or three-phase. It tells you how heat reaches the bean and what your building must supply. Ask: what pressure does the burner need, and what does the machine draw when the burner is off?
3. Control and probes (Stage 3). Look for: manual, touch screen or PLC; how many thermocouples, and whether one reads exhaust; a port for Artisan. It tells you how much of the roast the machine runs and how much you do. Ask: will it reproduce a stored profile without an operator? Ours: PLC on the SD Pro; Siemens screen with two probes on the YS series; manual with free Artisan on the DY.
4. Burner rating and batch window (Stage 4). Look for: burner output in kW or gas consumption per hour, alongside rated and recommended batch. Together they predict how fast your full load reaches first crack — and whether you will be roasting below rated batch to get there. Ask: at full batch, what is the typical time to first crack?
5. Cooling time and motor count (Stage 5). Look for: cooling time at full batch; separate motors for cooling fan and stirrer; tray capacity. This line, not batch size, sets your kilos per hour. Ask: can I charge the next batch while the tray is cooling?
6. Exhaust connection (Stage 6). Look for: duct diameter; whether the machine will take a smoke filter or afterburner later, because your neighbours and your local rules can change after you buy. Ask: what has to go outside, and what has to be in place before the machine is started up for the first time?
If those six lines are on the sheet, you can see the whole ten minutes before you have seen the machine. If they are not, you now know exactly what to ask for — and a supplier who cannot answer them has told you something too.
Frequently Asked Questions
How much does a commercial coffee roaster cost?
It depends on your batch size, heat source and control: a 1 kg manual machine and a 30 kg package with loader, destoner and afterburner sit at opposite ends of the range, and a PLC version costs more than the manual one. Every model we build has its ex-works price — the price at our door, before shipping — on its product page; your freight, duty and installation sit on top. What each price includes is in our commercial coffee roaster price guide.
What does a commercial coffee roaster machine need to run?
Four things, and you should check them in this order: power, heat source, an exhaust path and space. Confirm what voltage your site can supply before you choose between gas and electric — gas machines need only single-phase, electric from 3 kg needs three-phase. Then confirm your gas pressure, then where a duct can reach outside, then a clear path to the cyclone bin. The installation checklist walks through the five deadlines from lease to first roast.
What temperature should a commercial coffee roaster be set to?
There is no single number you set and leave. You preheat until the drum — not the air — reads its charge temperature, then manage heat by the rate of rise, not a fixed reading. Too hot at charge and the surface of your beans scorches before the inside dries; too cool for too long and they bake flat. Both are machine settings, not bean faults; coffee roast defects shows what each looks like in your tray.
Which is better, a drum roaster or a fluid bed roaster?
For production, a drum. A drum coffee roaster heats your beans through a hot wall and hot air, stores heat in the drum, handles 1–120 kg batches, and is what most commercial roasteries run. A fluid bed roaster uses only hot air, roasts faster with a lighter body, suits small batches, and still needs a separate cooler. It is worth a look only with no gas, no three-phase and small volumes; otherwise drum roaster vs fluid bed favours the drum.
How does a commercial coffee roaster work, stage by stage?
Six, in order: preheat and charge, drying, browning, first crack and development, drop and cooling, and chaff and smoke handling. Other guides count three, four or five — the difference is only in how the middle stages are grouped. What matters is that the burner, damper and fan settings change at each boundary, and that first crack is the one stage you hear rather than read.
Why does the same damper setting roast differently in winter?
Because the damper sets a position, not an airflow. Your chimney draws harder when the outside air is cold, so the same lever position pulls more air through the drum in January than in July — and more air means more heat leaving with it. If your first-crack times stretch when the weather turns, that is usually why. Judge the damper by your curve, not by where the handle sits; rate of rise in production roasting shows what to watch.
What makes a coffee roaster "commercial" rather than a home machine?
Duty, not the badge. A commercial machine is built to run your whole day: a drum that holds heat batch after batch, a cooling tray with its own fan so the drum is free in two minutes, an exhaust sized for hours of smoke, and motors rated for continuous use. Coming from a home machine, you lose the long rests between batches and gain one that behaves the same all day; if it drifts, coffee roaster troubleshooting says what to check.
How loud is a commercial coffee roaster?
About the level of your kitchen extractor. The noise is the fans, not the drum: the exhaust fan runs throughout, and the cooling fan adds to it for two minutes after each drop. If you are putting a 1–3 kg machine on your shop floor, your customers can talk over it; from 6 kg upwards the fans are larger, and most roasteries give the machine a room of its own rather than a spot behind the bar.
When can you switch a commercial coffee roaster off?
Not straight after the last drop. Leave the drum turning and the exhaust fan running with the burner off until the drum reads well under 100 °C, then stop the drum, then the fan. Stopping the drum hot warps it over time; stopping the fan early leaves smoke and heat in the duct. Most machines need 15–20 minutes to cool down, so plan the last batch of the day with that in mind.
Why do roasts come out darker over time with the same settings?
Usually the bean probe, not the coffee. After 50–100 batches a film of oil builds on the probe and it reads 3–4 °C lower than the true bean temperature, so you are roasting hotter than the display says. Clean the probe and run the three checks in temperature probe calibration before you touch the profile. If the drift continues, look at drum speed and bearings, which change how long beans sit on hot metal.
Final Thoughts
Once you can follow a batch through those six stages, a spec sheet stops being a list of words. Cast iron, semi hot air, PLC, four motors, two-minute cooling — each one now tells you how the machine will behave at a particular minute of the roast. Every roaster we build, from 1 kg to 120 kg, is listed with exactly those lines and its price on our commercial coffee roasters page, so you can read them the same way.
Get a quote or message Leon on WhatsApp at +86 184 0771 4607.
Get a Quote → WhatsApp +86 184 0771 4607Last updated: September 24, 2026